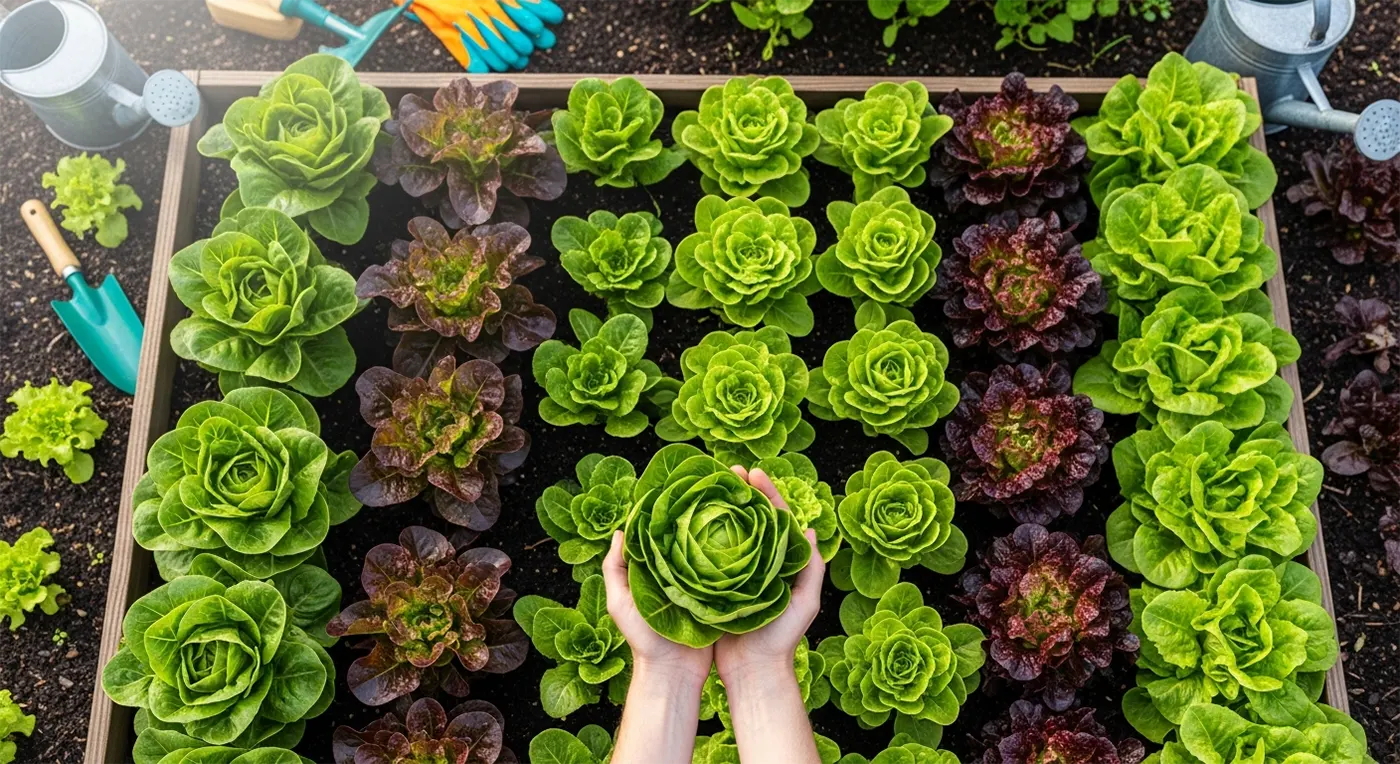
Cucumbers really are the most refreshing snack on a hot summer day. Cucumbers are an easy-to-grow crop for a beginner as long as you know the basics on how to grow them and what problems you might encounter ahead of time.
Cucumbers are warm-weather vegetables that grow best when temperatures are hot and water is plentiful. Cucumber plants come in two growth forms: vine-like and shrub-like. Vining cucumbers sprout quickly and climb vigorously along trellises or supports. With consistent watering, the vines will continuously provide you with crisp, refreshing cucumbers. These plants require little care; just a little space for them to spread or climb, and you’ll soon find yourself harvesting cucumbers faster than you can eat them. Shrub-like cucumbers, such as thornless shrub hybrids, have a compact form and are suitable for potted plants and small gardens. Vining cucumbers typically yield higher yields throughout the growing season, while shrub-like cucumbers can also produce a good harvest if sown in batches every two weeks.
Cucumber Varieties
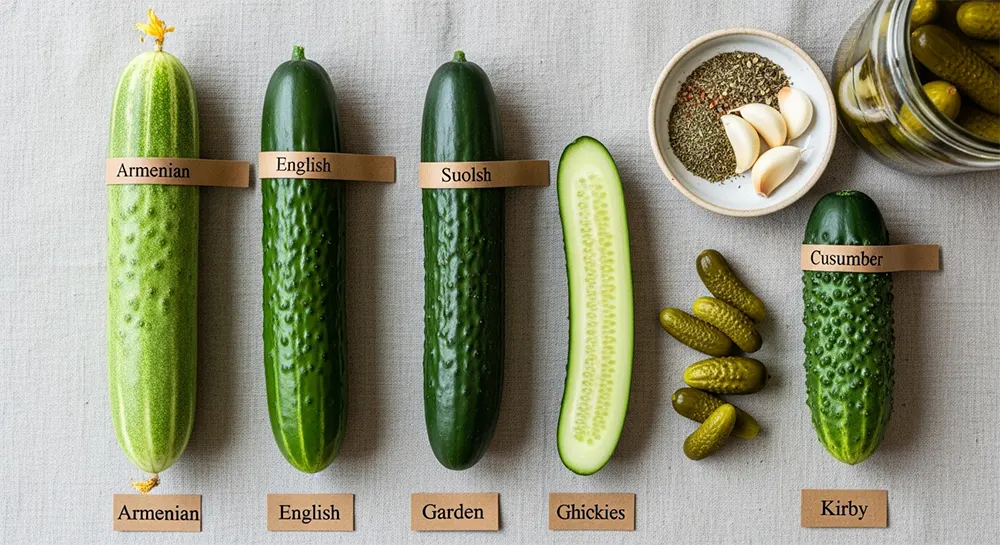
There are many common varieties of cucumbers, such as Armenian cucumbers, English cucumbers, lemon cucumbers, and Persian cucumbers. Choosing the right variety is important, as some cucumbers are not suitable for pickling but are better eaten fresh. Slicing a few pieces and adding them to a cocktail can create a unique flavor. Some varieties have large seeds and need to be deseeded before eating. You can select cucumber varieties based on how you plan to use them.
Armenian Cucumbers
Armenian cucumbers are long and slender, with slightly mottled skin in light green or yellow-green shades. They are crisp and refreshing, and delicious when sliced and eaten raw. There is no need to peel or remove the seeds before eating. However, they are not suitable for pickling.
English (or Seedless) Cucumbers
English cucumbers are also known as greenhouse cucumbers or seedless cucumbers. They are long with dark green skin. Their flavor is mild and almost neutral. They are popular because of their thin skin and few seeds. Like Armenian cucumbers, English cucumbers are best eaten raw and are not ideal for pickling. However, they work wonderfully in cocktails.
Garden Cucumbers
The most common cucumbers in North America are garden cucumbers. They have relatively smooth, dark green skin. Classic garden cucumbers contain large seeds, so many recipes call for removing the seeds before use. Once deseeded, they work well in almost any recipe.
Gherkins
Gherkins are very small cucumbers, sometimes less than two inches long. If you are looking for cucumbers for pickling, gherkins are a great choice because they fit easily into jars. They are often served with meat sauces or used as pickles.
Kirby Cucumbers
Kirby cucumbers are usually short with bumpy skin. Their color ranges from yellow-green to dark green. They are crisp and flavorful when eaten fresh and are excellent for pickling. Sometimes they are even sold under the name “pickling cucumbers.”
Planting time
Cucumbers are best planted in late spring and summer after the danger of frost has passed. Cucumber plants and seeds do not tolerate cold temperatures, especially when the soil temperature is below 65°F (18°C). In addition, cucumber plants do not grow well when nighttime temperatures fall below 40°F (4°C). Therefore, in spring it is important to monitor the weather and choose a planting period when nighttime temperatures stay above 50°F (10°C) and daytime temperatures reach 70°F (21°C) or higher. The key is to wait until the soil is warm enough. Cucumber seeds will not germinate in cold soil. Be sure to check the soil temperature at the planting depth (about 1/2 inch) in the morning and make sure it is at least 65°F (about 18°C). It is recommended to measure the soil temperature before planting. If spring temperatures are low in your area, you can start seeds indoors 3–4 weeks in advance at about 20–25°C, then transplant them outdoors after they have developed 3–4 true leaves and have been hardened off.
Soil Preparation
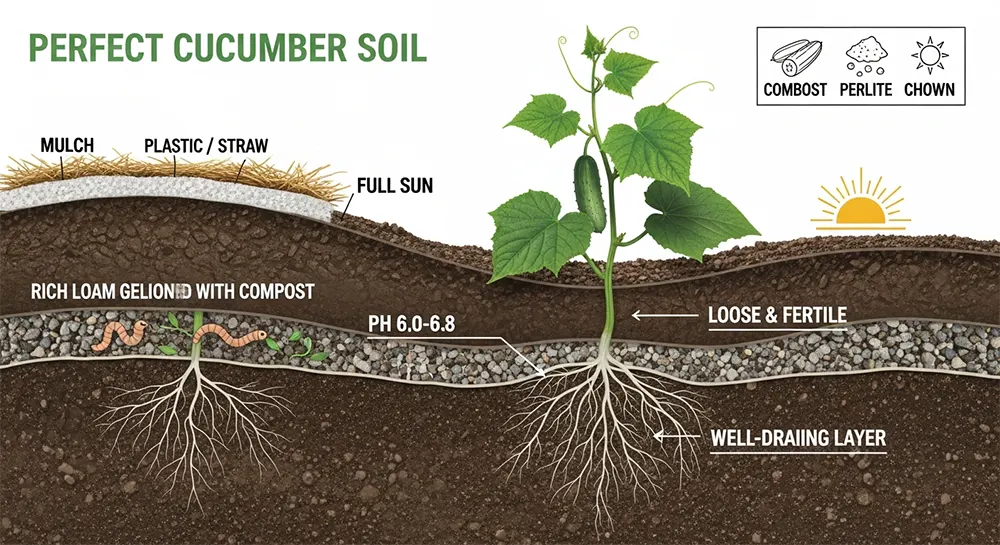
Cucumbers thrive in loose, fertile, and well-drained loam or sandy loam soil. Avoid compacted or waterlogged soil to prevent root rot and other diseases. The ideal soil pH for cucumber growth is 6.0-6.8. Slightly acidic soil facilitates nutrient absorption, while alkaline soil can cause yellowing leaves. Before planting, work plenty of well-rotted manure or compost into the soil to provide sufficient nutrients. During the growing season, apply fertilizer as needed. During flowering and fruiting, supplement with phosphorus and potassium, and avoid excess nitrogen, which can cause excessive leaf growth with few fruits.
Before planting, till the soil to a depth of 20-30 centimeters. If necessary, mix in vermiculite or perlite to improve soil aeration and water retention. For outdoor planting, you can create an ideal growing environment for cucumbers by covering the soil with plastic mulch to retain moisture, regulate soil temperature, and suppress weeds.
Like all fruiting plants, cucumbers grow best in full sun. Choose a location in your garden that receives at least six hours of direct sunlight daily; eight hours or more of sunlight is ideal.
آبیاری
Cucumbers prefer moist soil but are not tolerant of waterlogging, so the soil should be kept evenly moist. During the growing season, water in the morning and evening if needed, and try to use drip irrigation or water the roots directly. If you want to reduce the risk of powdery mildew and downy mildew, you need to keep the leaves dry.
در طول گلدهی و میوهدهی، خیارها به آب فراوان نیاز دارند، اما از آبیاری سنگین و یکباره خودداری کنید، زیرا این کار میتواند باعث تلخ شدن میوه یا آسیب به ریشهها شود. در دورههای خشک، به موقع آبیاری کنید و در دورههای رشد قوی، دفعات آبیاری را افزایش دهید و رطوبت خاک را در حدود ۶۰ تا ۷۰ درصد حفظ کنید.
خیارهای گلدانی باید با توجه به خشکی خاک، به طور انعطافپذیر آبیاری شوند. در طول فصل بارندگی یا در خاک با زهکشی ضعیف، از زهکشی خوب برای جلوگیری از غرقابی شدن و پوسیدگی ریشه اطمینان حاصل کنید. آبیاری باید بر اساس دما، نور خورشید و شرایط خاک تنظیم شود و هدف آن آبیاری مکرر، متوسط و مداوم باشد تا محیط رطوبتی پایداری برای رشد سالم خیار فراهم شود.
Trellising Cucumbers
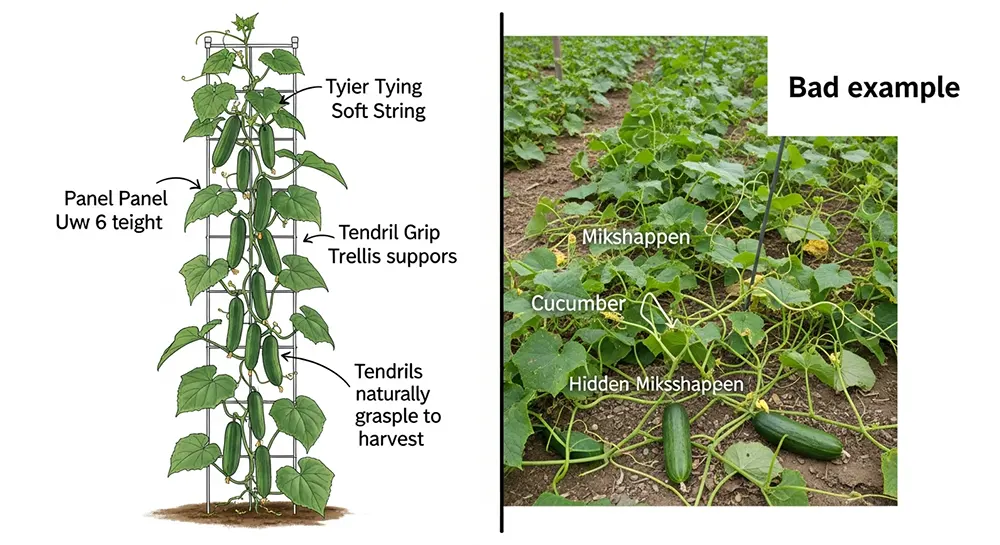
ساختن داربست برای خیار به آنها کمک میکند تا قوی و سالم رشد کنند. برخی از انواع بوتهای نیازی به تکیهگاه ندارند، اما طبق تجربه من، تربیت خیارهای تاکدار روی داربست و اطمینان از اینکه پیچکهای آنها همیشه چیزی برای گرفتن دارند، منجر به گیاهان سالمتر و عملکرد بالاتر میشود.
داربستهای پنلی و اوبلیسک مانند با حداقل ارتفاع ۶ فوت (حدود ۲ متر) بسیار خوب عمل میکنند، و خیارهایی که روی داربستهای قوسی رشد میکنند نیز میتوانند تفاوت زیادی ایجاد کنند. پیچکهای کوچک خیارها مانند میمونی که یک باشگاه جنگلی را میگیرد، دور تکیهگاهها میپیچند. با این حال، گاهی اوقات پیچکها نمیتوانند جای خوبی پیدا کنند و در هوا معلق میمانند. وقتی این اتفاق میافتد، ممکن است رشد گیاه متوقف شود، یا ساقه به سمت پایین دور داربست بپیچد.
بهترین راه برای اطمینان از اینکه شاخههای خیار به درخت متصل میمانند، بستن آرام آنها به داربست است. گیاهان خود را هر هفته با مقداری نخ و قیچی بررسی کنید. چند اینچ نخ ببرید و بالای شاخه را به طور شل به تکیهگاه ببندید. به یاد داشته باشید، خیارها گیاهان ظریفی هستند، بنابراین مراقب باشید که شاخهها را نشکنید. این کار به آنها اجازه میدهد تا به بالا رفتن ادامه دهند و میوه بیشتری برای شما تولید کنند.
Fertilizing Cucumbers
خیار محصولی با نیاز غذایی بالا است و به کوددهی فراوان نیاز دارد. کوددهی باید با توجه به مراحل مختلف رشد تنظیم شود. قبل از کاشت، کود دامی یا کمپوست پوسیده را با خاک مخلوط کنید تا پایه مواد مغذی فراهم شود و ساختار خاک بهبود یابد. در مرحله نهال، مقدار کمی کود نیتروژن برای تقویت رشد ریشه و برگ استفاده کنید. در طول گلدهی و میوهدهی، روی تأمین فسفر و پتاسیم تمرکز کنید.
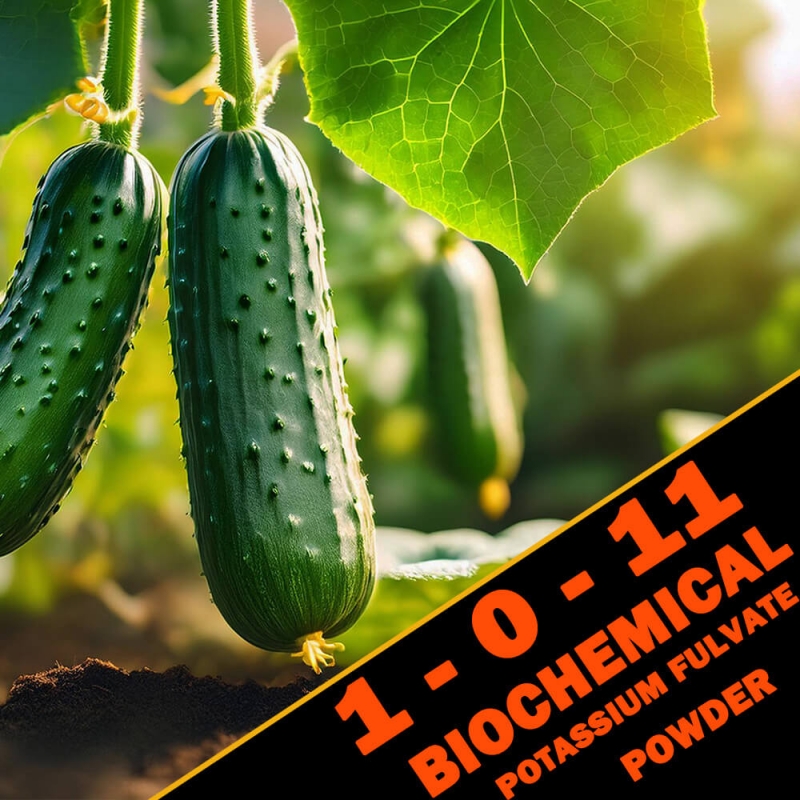
کود فولوات پتاسیم روتوم ۱-۰-۱۱ با پتاسیم بالا به تشکیل جوانه گل و بزرگ شدن میوه کمک میکند و عملکرد و کیفیت میوه را بهبود میبخشد.
کودها باید در دوزهای کوچک و مکرر اعمال شوند تا از سوختن ریشه یا رشد بیش از حد رویشی جلوگیری شود. وقتی خیارها با شدت رشد میکنند، میتوان تغذیه اضافی را همراه با آبیاری با استفاده از محلول یا کودهای محلول در آب. کاربرد روتوم VIRI شمارهٔ ۲ ۸-۶-۶ کود اسید هومیک به حفظ تعادل عناصر غذایی خاک کمک میکند. از مصرف بیش از حد کود نیتروژنی خودداری کنید، زیرا نیتروژن زیاد میتواند منجر به رشد شاخ و برگ پرپشت اما گلها و میوههای کمشمار شود. بهطور منظم رنگ برگها و رشد گیاه را زیر نظر داشته باشید و در صورت نیاز میزان کوددهی را تنظیم کنید تا رشد سالم گیاه و عملکرد بالای پایدار تضمین شود.
Pollination Problems

یک مشکل رایج در کشت خیار این است که گیاهان گل میدهند اما میوه نمیدهند. این میتواند ناشی از عوامل مختلفی باشد. اول، مهم است بدانید که گلهای نر قبل از گلهای ماده باز میشوند و گلهای نر حشرات گرده افشان را جذب میکنند.
با این حال، اگر متوجه شدید که گلهای ماده شکوفا میشوند اما به میوه تبدیل نمیشوند، مشکل ممکن است گرده افشانی ناکافی باشد. میوههای بدشکل همچنین میتوانند در اثر گرده افشانی ناقص ایجاد شوند. این میتواند به دلیل کمبود گرده افشانها باشد، یا میتواند به دلیل آب و هوای بد باشد که مانع از پخش گرده میشود. اگر مورد دوم باشد، آبیاری را ادامه دهید و منتظر بهبود آب و هوا باشید. سپس گرده افشانی باید از سر گرفته شود. همچنین میتوانید با استفاده از ابزار به گرده افشانی خیار کمک کنید: میتوانید یک گل نر را بچینید و آن را به گل ماده بمالید، یا از یک قلم موی کوچک برای جمع آوری گرده از گل نر استفاده کنید و به آرامی آن را روی گل ماده بمالید.
برداشت و ذخیره سازی
خیارها گیاهانی با چرخه رشد نسبتاً طولانی هستند، بنابراین میتوانند حداقل ۶۰ تا ۹۰ روز در باغ شما رشد کنند. بیشتر گیاهان حدود ۵۵ روز پس از کاشت میوه میدهند.
کلید پرورش خیار، برداشت زودهنگام و مکرر آن است. یکی از مزایای کشت عمودی خیار این است که گیاهان پایدار میمانند و پیدا کردن میوه را آسانتر میکند. مطمئناً نمیخواهید خیارها زیر شاخ و برگهای انبوه پنهان شوند و مواد مغذی و سایر منابعی را که تاک باید برای میوه جدید استفاده کند، مصرف کنند.
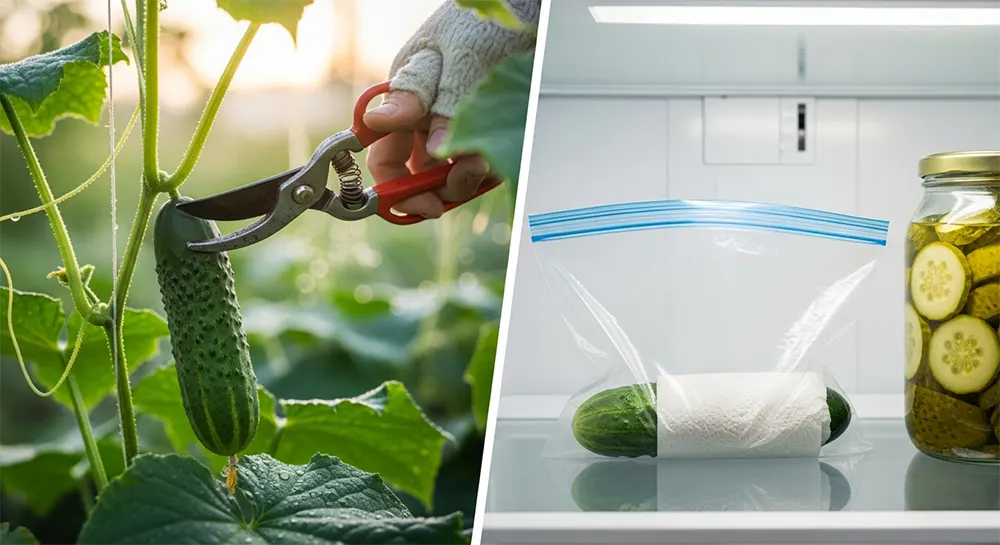
یک بوته خیار میتواند بسته به نوع آن، ۱۰ تا ۲۰ میوه تولید کند. غیرممکن است که فقط یک یا دو دانه خیار پرورش دهید و دیگر هرگز مجبور به خرید خیار نشوید. برای برداشت مقدار زیادی خیار، باید بوتههای خیار زیادی بکارید. بهترین زمان برداشت، صبح زود است که میوهها شیرینترین حالت خود را دارند. از قیچی باغبانی تمیز برای بریدن میوهها از ساقه استفاده کنید. حتماً قبل از اولین یخبندان پاییزی، تمام میوهها را برداشت کنید.
خیارها پس از برداشت، محتوای آب بالایی دارند و سرعت تنفس آنها بالاست، که آنها را به دمای بالا، خشکی و یخبندان حساس میکند. نگهداری مناسب برای حفظ بافت ترد آنها بسیار مهم است. میتوانید خیارها را در حوله کاغذی یا روزنامه بپیچید، آنها را در یک کیسه پلاستیکی بدون درب قرار دهید و سپس آنها را در دمای 7 تا 10 درجه سانتیگراد در یخچال نگهداری کنید. اگر انواع خیار مناسب برای ترشی انداختن را پرورش میدهید، میتوانید با ترشی انداختن، عمر نگهداری آنها را افزایش دهید. خیار ترشی همچنین وقتی با سس گوشت ترکیب شود، طعم بینظیری دارد.